Vertical Sliding Sash Windows | Explanation
The basic difference between Vertical Sliding Sash Windows and case window is the use of ‘spiral’ Balance each side of both sashes to support sashes in an open or closed position.
Spiral balances are made of alloy tubes, with a hole for screw fixing at one end. For the style of the case. A flat
 metal strip protrudes from the other end of the tube Twisted into a spiral. The end of the tube is finished with a rectangular slot When the coil is withdrawn or pushed inside, the coil rotates.
The hidden end of the coil is attached to a strong spring fixed inside the tube. As the coil rotates, the spring is never tightened, and if the free end of the coil is attached to the sash, the weight of the casing is supported.
Fixing the balance to the sash is done with a metal bracket that allows for balance
Release and reset to Sash easily and efficiently. Balance is made with a range of spring capabilities that match everything except large sashes.
In many cases, the deciding factor is the use of double or triple glazing. Figure 9.22 illustrates the typical style detail of the vertical sliding sash window and sash balance.
The balance can be placed in the groove in the sash – usually used during installation
Balance to old wire windows.
In detail on a new or replacement window, the balance is often placed in the groove on the backplate, which has a thicker wood than the traditional sash and case window. Notice how the split bead is a plastic extrusion with multiple blade wiper seals between the sash and the sash has brush seals between them and the backplate.
The only contact on the wood is the coverings touching the outside and hitting the rod. This reduces friction considerably and makes it stick to the sashless wet condition.
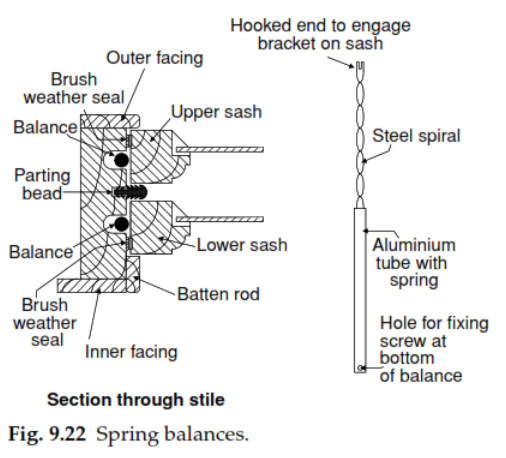
Color should not be allowed to sell any of these seals. The balance has a hole to attach the common wood screw to the style, and the coil has a split hook that fits into the bracket mounted on the corner of the sash.
One pair of balances is used for each sash. Balances are purchased that match the weight of the sash but can be adjusted by turning the coil before attaching it to the bracket.
The facings are the same size as the sash and case windows; However, backplates and
The heads usually have 50 or 65 thick trees.
Vertical Sliding Sash Windows:
Spiral balances can be applied to windows made of plastic and metal
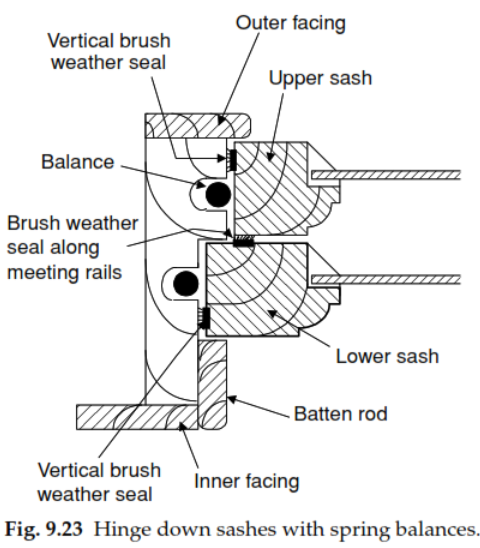
Do not lend themselves to counterweights, pulleys, and rope fittings. An alternative mechanism for this type of window is shown in Figure 9.23.
The idea here is to allow the traditional vertical movement of the sashes, but also to add the possibility of tilting the sash inwards (from the top of each sash) for ease of cleaning. The system must combine a pair of stays to prevent each sash from being completely tilted, and the balances that combine them are available.
These can be adapted for discounted cuts on backplates. Baton rods are hinged on both frame styles and can be folded clearly with styles. They are placed in the operating position by captive thumbscrews.
When the batten rods are pushed back, first the bottom cover and then the top cover can be tilted inward to clean. The figures from 9.24 to 9.30 are from the various old and fairly new sash and case windows of the traditional model.
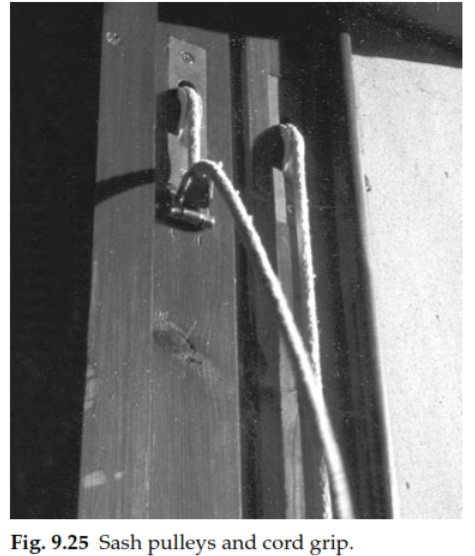
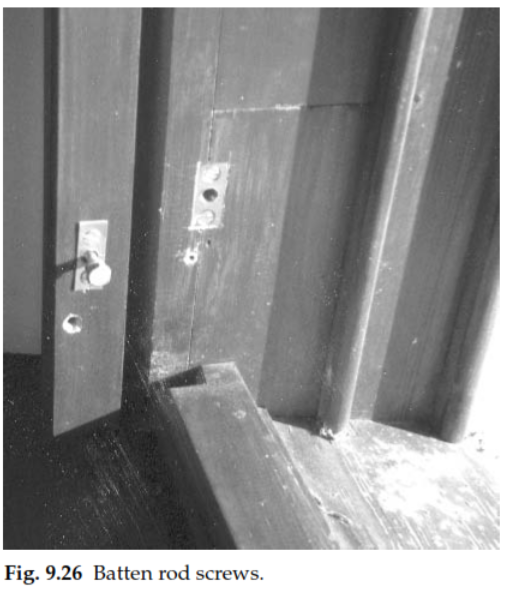
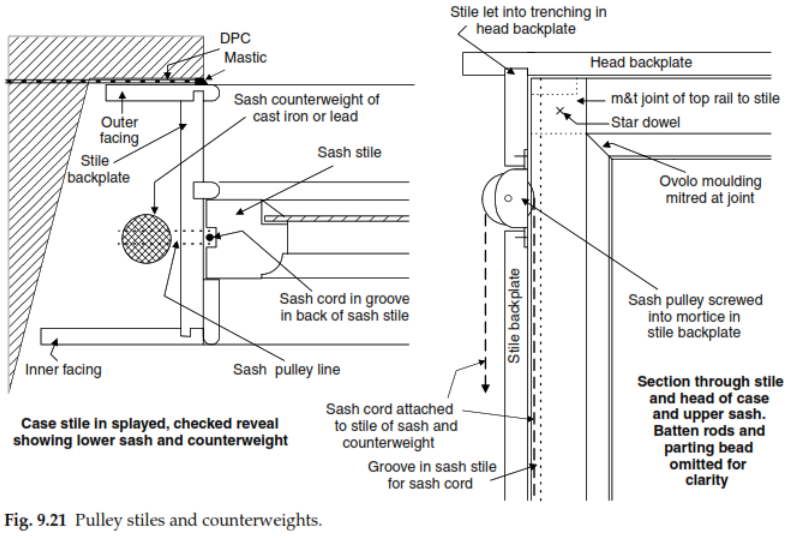
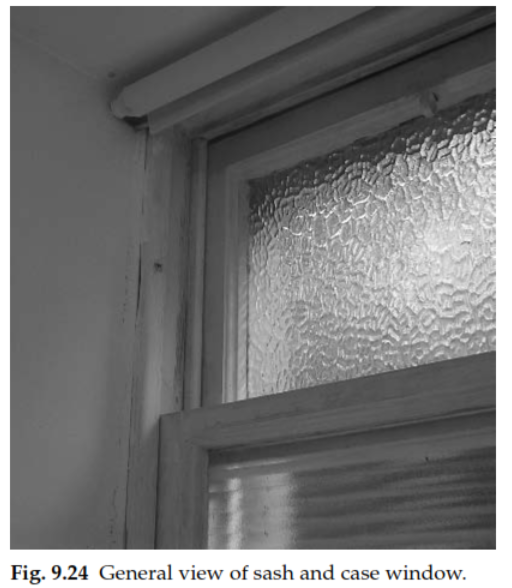
Figure 9.24 is a general view of the upper part of an old window with two sashes. Only the top sash opens and the sash has ropes and sash weights. Figure 9.25 is taken from the inside of a more modern window and shows two pulleys on the case backplate.
The left-hand cord moves through the cord grip, which allows the user to pull the cord and increase the weight of the sash, allowing the sash to be released from the ropes. Figure 9.26 shows the batten rod being removed and the captive screws holding it can be clearly seen on the rod and the backing plate.
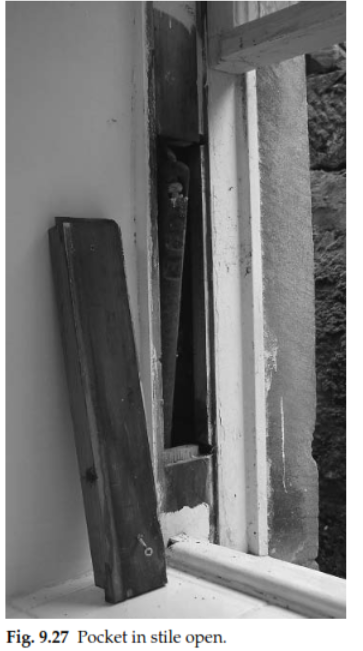

The separating bead is still in place. Figure 9.27 shows and shows the separating grooves removed Pocket – Weighted access panel – It is cut to the backplate. Notice how
The pocket cover is cut in the groove for the separating bead.
Utility Windows:
When inserting the dividing grooves, it keeps the cover in place with the bottom cover. Maintenance work can be carried out, such as changing the ropes, adding weight, and reducing the stretched ropes. Joint image of Figure 9.28 Sash style and sash sill.
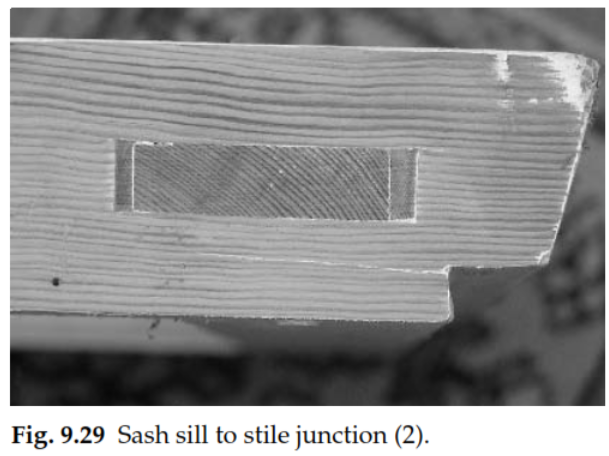
Mortise and tenon joints with a dowel of the joint, which can be seen face pride under the paint. Figure 9.29 is the same joint as seen from the side, and both sides are held firmly to the end of the tenon.
Also Read: