Traditional roofs | Timber
The traditional roofs. This is best illustrated with some photographs, some of the more recent – one The roof of the pillar plate is only three years old and yet the technique has been shown before The author was about 45 years ago and so old.
Figures 6.31, 6.32, 6.33, and 6.34 are quite old roofs (1961). It had a 54◦ pitch – very steep – and three rooms were formed in the attic. Rooftop tiles were laid and partly on the brick sections and partly on the RSJ, they formed the attic floor.
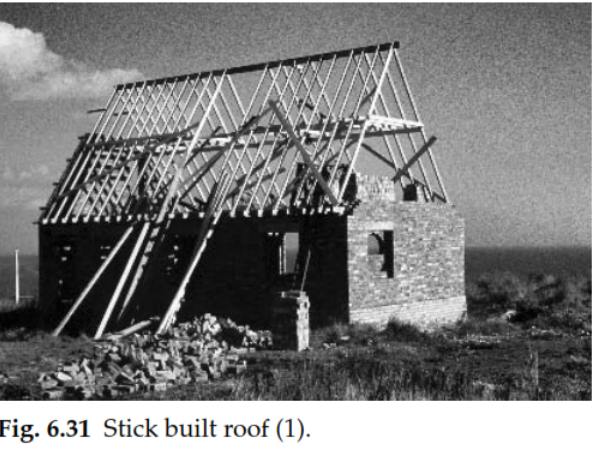
About 35 square trees were left to dig along with the point where the rafters meet the ends of the ties. The ends of the rafters were scattered at right angles and lengths and a point was cut at one end to go over the wood left for the tie. The rafters were then installed in pairs with the ridge board at intervals along the roof.
Collars were installed to support the ceiling in the attic, and hangers were eventually added to break the bottom of the rafters. They were drilling on a tray that was tied to the top of the tie. Ties were simply nailed to the wall panel, which was only lined with mortar on the brick walls.
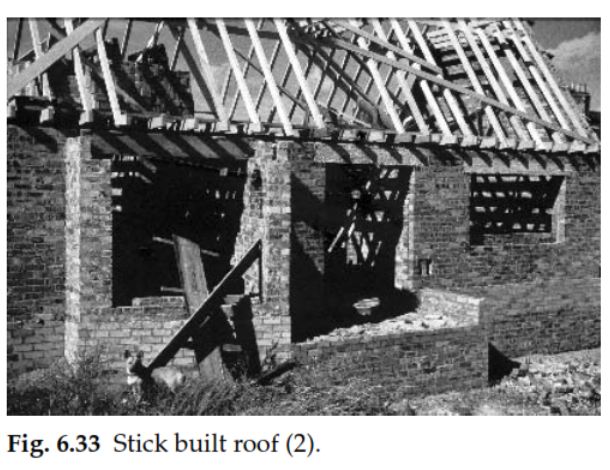
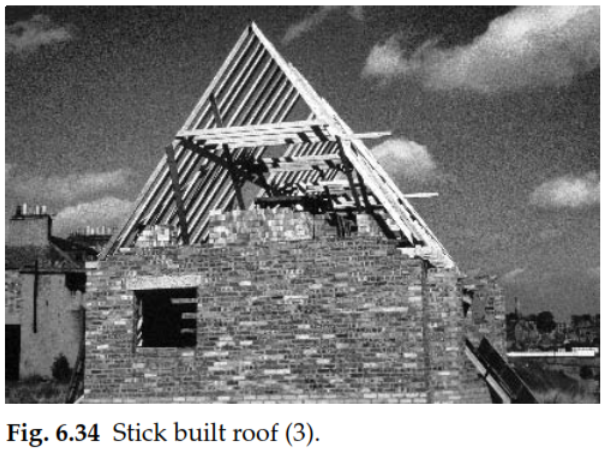
Temporary bracing was inserted into the rafters and the sarking boards were struck.
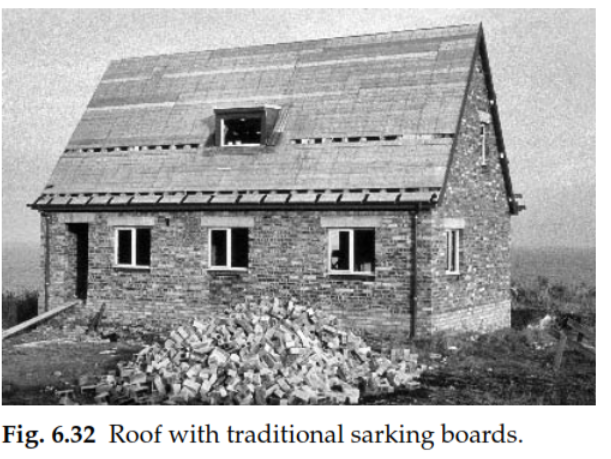
The entire roof surface was eventually covered with felt and concrete interlocking tiles. A roof photograph with sarcasm shows that some boards are missing.
Traditional Roofs in Japan:
These were laid as boarding went but they did not sprout. Once Two more boards were stuck on them, the boards were stripped and the lower boards temporarily smashed.
This gap gave carpenters a foothold to step up and complete more boarding. After attaching the last board to the ridge, the carpenters took a step back and left the previous boards to the left. And thus under the roof.
These steps you see in the photograph are skipped so that the plumbers can go up and
Fix the lead around the dormer window. They were first used by carpenters
Dormer was doing window framework and cladding.
With the exception of ties, all of the roof trees were 100 × 50 sauns, and the timber was selected by a slight overload order in order to obtain the direct-grain trees with no more knots for all the critical trees.
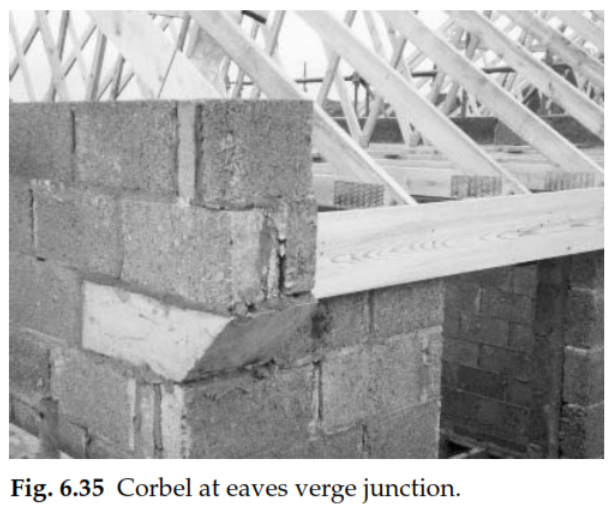
Figure 6.35 Not so much about the roof. It is, after all, a trussed rafter roof As shown earlier. It’s more about the wall that sticks to you in the center of the picture. It is a gable wall that runs to the left of the picture.
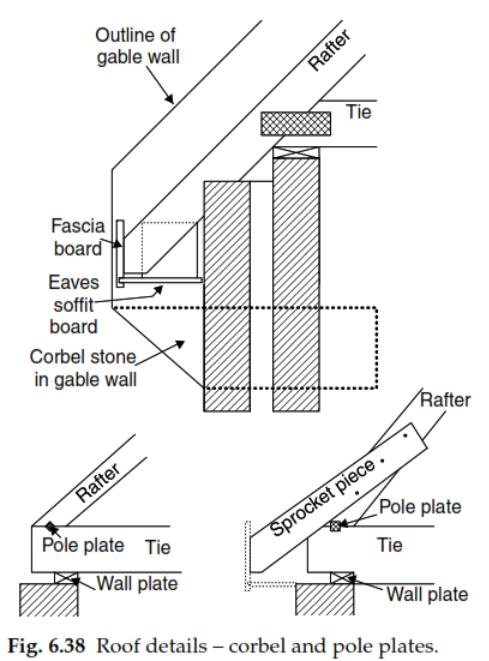
Notice how the designers used the corbel ‘masonry’ – concrete projecting block to move the wall beyond the front wall of the building and thereby facilitate the joints of the edges.
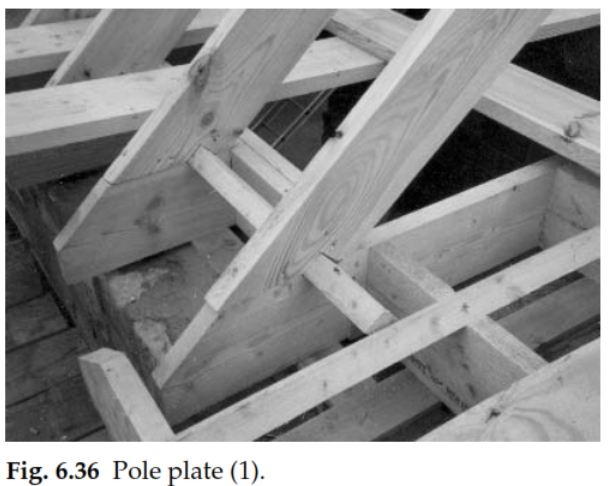
A diagram of what this detail looks like is presented in Figure 6.38. Figures 6.36 and 6.37 show the rafter feet for building a junction on the roof of the pillar plate. The problem with rafters is that they tend to spread their feet under the tiles and wind and snow load.
Many roofs attach to the tie by making the rafters halfway up the rafters and gluing them to the side of the tie. The joint is completely dependent on the nail. On the pole plate roof, the pole plate itself acts as a key between the rafter feet and the ends of the tie and prevents the rafter feet from slipping.
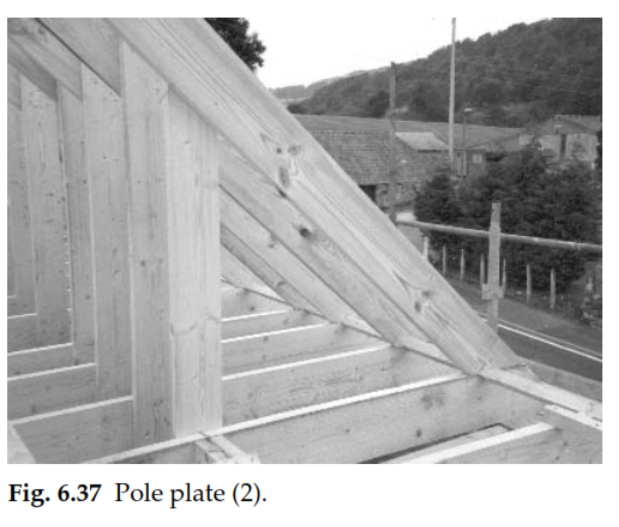
Figure 6.38 contains a description of the critical junctions on both pole plate roofs
Was done Also included in how the Sprocket Piece was used to complete and support the eaves construction on the 1960s house.
Also Read:
2 thoughts on “Traditional roofs | Timber”